Add your first files
Start by creating a folder for one real piece of work, such as a project or a client, and put its files there. You can add more structure later; moving an item keeps its history.
Create a folder
- In the Explorer sidebar, under Folders, open the folder that should contain the new one.
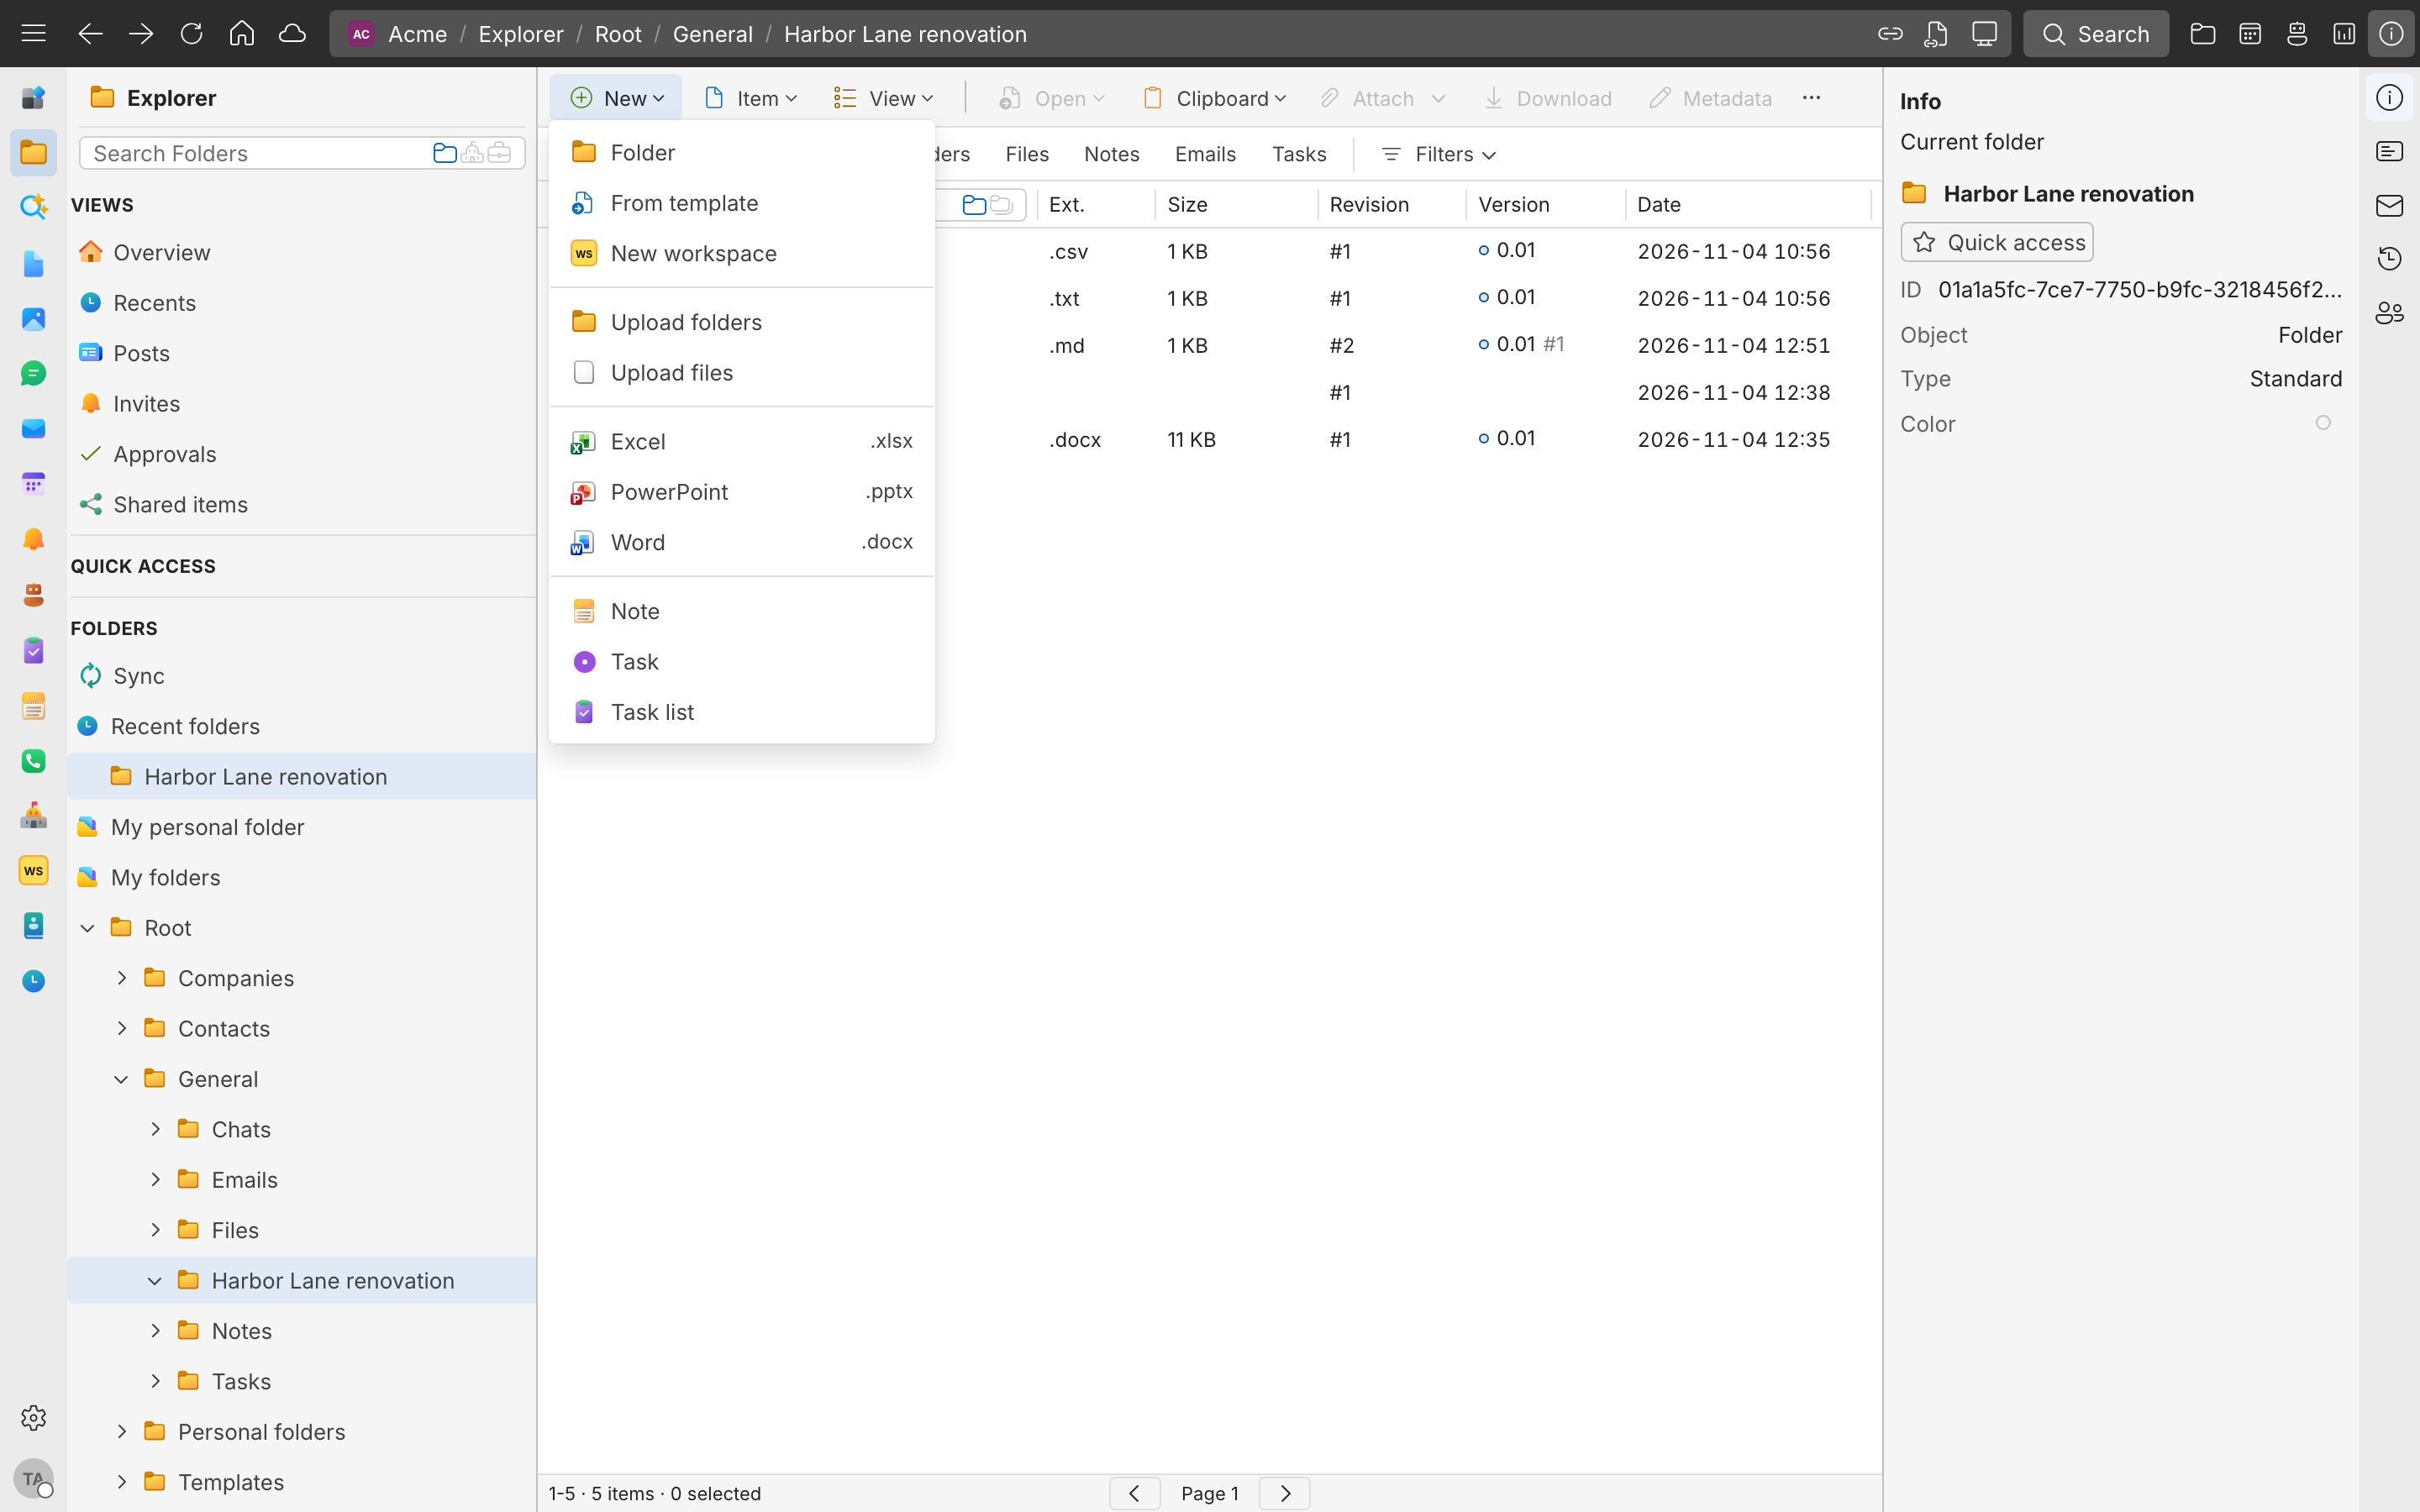
- In the toolbar, select New > Folder.
- Enter a Folder name and select Create.
Upload files
- Open the folder you want to upload into.
- Select New > Upload files to choose files, or Upload folders to upload a folder with everything in it.
- In Confirm upload, check the files and the destination, and select Upload.
You can also drag files and folders from your computer onto the folder.
Tip
For very large uploads, or to work on a whole folder on your computer, use SynckHub Desktop. See SynckHub Desktop.
Create a new document
Open a folder, select New, and choose what to create:
| Choose | Creates |
|---|---|
| Word, Excel, or PowerPoint | An empty Office document, ready to edit |
| Note | A Markdown note, saved as a .md file |
| Task list or Task | A list for tracking work, filed in the folder, or one task |
| From template | A copy of a template your company prepared |
What appears in New depends on the folder and on your permissions. If you can’t create anything in a folder, ask someone who manages it to give you Basic editor access or higher.
Find what you added
- Open Files on the app rail to see files from every folder.
- Type a name into the search box in the header.
- Open Recents in the Explorer sidebar to see what changed most recently.
Next steps
- Invite your team
- Files and folders for opening, editing, moving, and deleting.